Unveiling the Magic of Glazing: A Guide to Basic Glazing Techniques for Firing Homemade Ceramics

Ceramics, the art of transforming earth into beautiful and functional objects, has captured human imagination for centuries. Glazing, a key step in the ceramic process, turns raw clay into vibrant, durable creations. Whether you’re a novice potter or an experienced ceramic artist, understanding the fundamentals of glazing is essential for achieving the desired aesthetic and functionality of your homemade ceramics. In this guide, we’ll take a deep dive into the world of glazing, exploring basic techniques, tips, and tricks for successful firing.
Glazing is ultimately the art of applying a glass-like substance to the surface of ceramics before firing. This process serves multiple purposes:
Aesthetic Enhancement
Glazing adds colour, texture, and visual appeal to ceramics. It allows artists to create intricate patterns, gradients, and designs that elevate the final piece.
Protection
Glazes form a protective layer over the ceramic surface, shielding it from moisture, stains, and wear. This is especially important for functional ceramics like mugs and plates.
Fusion and Sealing
During firing, glazes undergo chemical changes that bond them to the clay surface. This creates a sealed, impermeable layer that prevents liquids from penetrating the ceramic.
Surface Modification
Glazes can alter the tactile qualities of ceramics, making them smooth, glossy, matte, or textured, depending on the chosen glaze.

Choosing Glazes
There’s a vast variety of glazes available, each with distinct properties and firing temperatures. Select glazes that suit your clay type, intended use of the piece, and desired aesthetic. You can easily test glazes on sample tiles to see how they interact with your clay, kiln or set up and to explore different combinations.
Surface Preparation
Before glazing you should ensure that your ceramics are free of dust, debris, and oils. Wiping the surface with a damp sponge and allowing it to dry will create an ideal base for glaze application.
Dipping
Dipping involves submerging your ceramic piece into a container of glaze. Hold the piece at its base and slowly lower it into the glaze, then lift it out smoothly to ensure even coverage. This technique is efficient for covering large surfaces.
Pouring
Pouring glaze onto your ceramic piece allows for more controlled application, particularly on intricate shapes. Pour the glaze onto the piece, allowing it to flow and cover the surface evenly.


Brushing
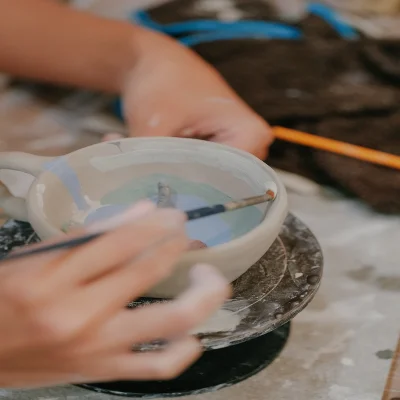
Brushing provides precision and control over glaze application. Use soft, natural hairbrushes to apply glaze to specific areas or create detailed designs. Ensure even strokes and avoid overbrushing, which can lead to streaks or pooling.
Spraying
For an even and smooth application, consider using a spray gun or airbrush. This technique works well for achieving gradients or covering complex surfaces.
Layering and Combining
Experiment with layering different glazes to create unique effects. Apply one glaze over another to achieve variations in color, texture, and opacity. Keep detailed records of your experiments to replicate successful results.
Wax Resist
Wax resist is a technique used to prevent glaze from adhering to specific areas. Apply wax to these areas before glazing, allowing you to create intricate patterns and designs with multiple layers of glaze.
Tips for Successful Glazing
1. Consistency – Consistency in glaze application is crucial for uniform results. Strive for even thickness and avoid excess glaze pooling, which can lead to drips or uneven firing.
2. Glaze Testing – Always test new glazes on sample tiles before applying them to your ceramics. Firing a test tile allows you to observe how the glaze reacts with your clay and how it looks at different temperatures.
3. Careful Handling – Handle your ceramics with care during glazing to avoid leaving fingerprints or smudges on the glazed surface. Use clean, dry tongs or gloves when moving pieces.
4. Glaze Compatibility – Ensure that the glazes you choose are compatible with each other and with your clay body. Some glazes might react negatively when layered, resulting in unexpected results.
5. Avoid Glaze Contamination – Clean your tools and equipment thoroughly to prevent cross-contamination between different glazes. Small traces of one glaze mixing with another can lead to undesirable outcomes.
6. Experimentation and Creativity – Glazing is an art form in itself. Don’t be afraid to experiment with different techniques, layering, and combinations to achieve the desired effects. Your creativity knows no bounds!
So in conclusion, glazing is the transformative step that brings ceramics to life, turning them from humble clay objects into stunning works of art or functional pieces. As you embark on your journey with glazing, remember that practice, experimentation, and patience are your allies. Through trial and error, you’ll uncover a world of possibilities, from bold and vibrant hues to subtle and elegant textures. With a solid understanding of glazing techniques, you can confidently create homemade ceramics that reflect your unique style and passion. So, roll up your sleeves, pick up that brush or tongs, and let the magic of glazing unfold as your ceramics undergo a breathtaking metamorphosis in the fiery kiln.
